
Follow Me On Social Media!
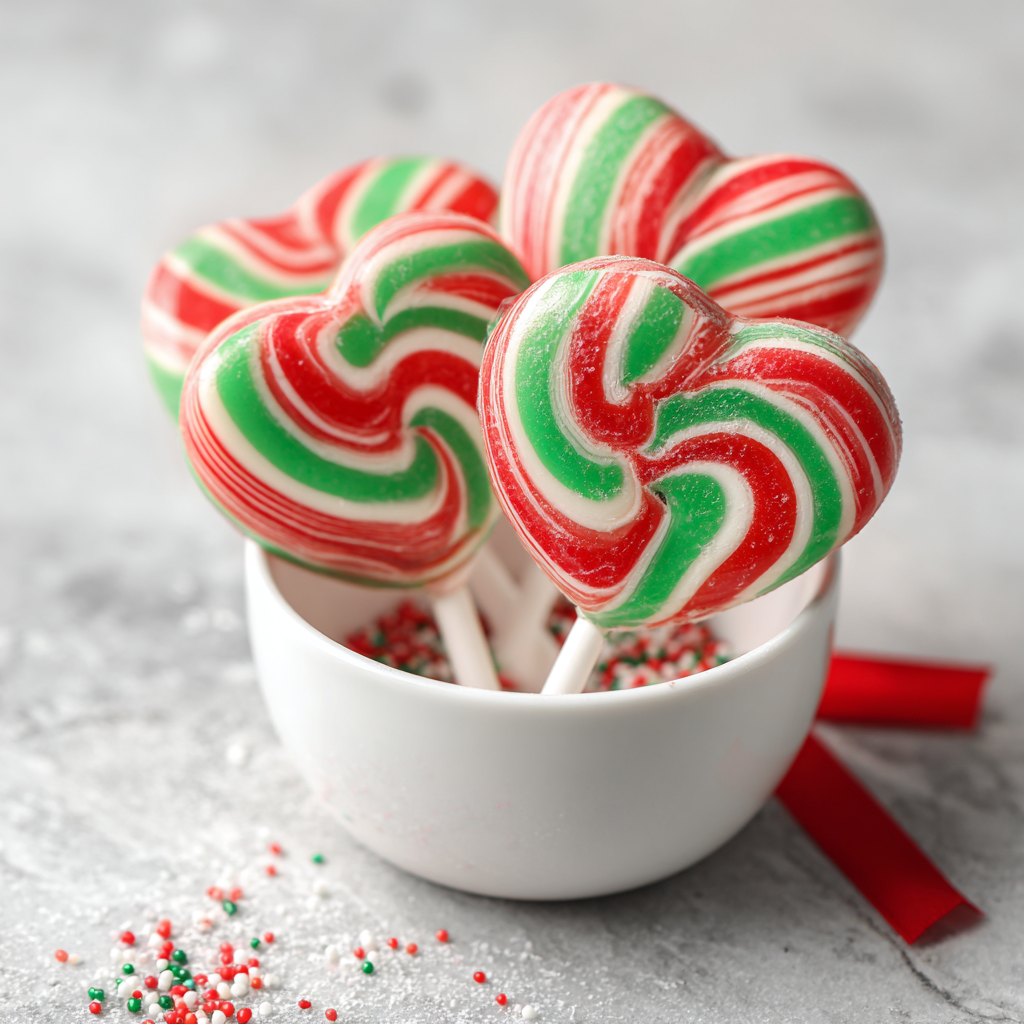
Christmas Candy Cane Heart Lollipops: The Ultimate Festive “Two-Ingredient” Craft
Can a Holiday Treat Be Both a Decoration and a Dessert?
Did you know that the “hook” of a candy cane was originally designed in the 17th century to help hang the sweets on Christmas trees? While many see candy canes as a static snack, the secret to the Candy Cane Heart Lollipop lies in the physics of thermoplasticity—sugar’s ability to become malleable at specific temperatures without losing its structural integrity. If you have been searching for a handmade gift that looks professionally “boutique” but requires almost zero culinary skill, these lollipops are the answer. By leveraging the natural shape of the cane, we create a symmetrical heart that serves as the perfect frame for a custom chocolate or candy center.
Ingredients & Tools List
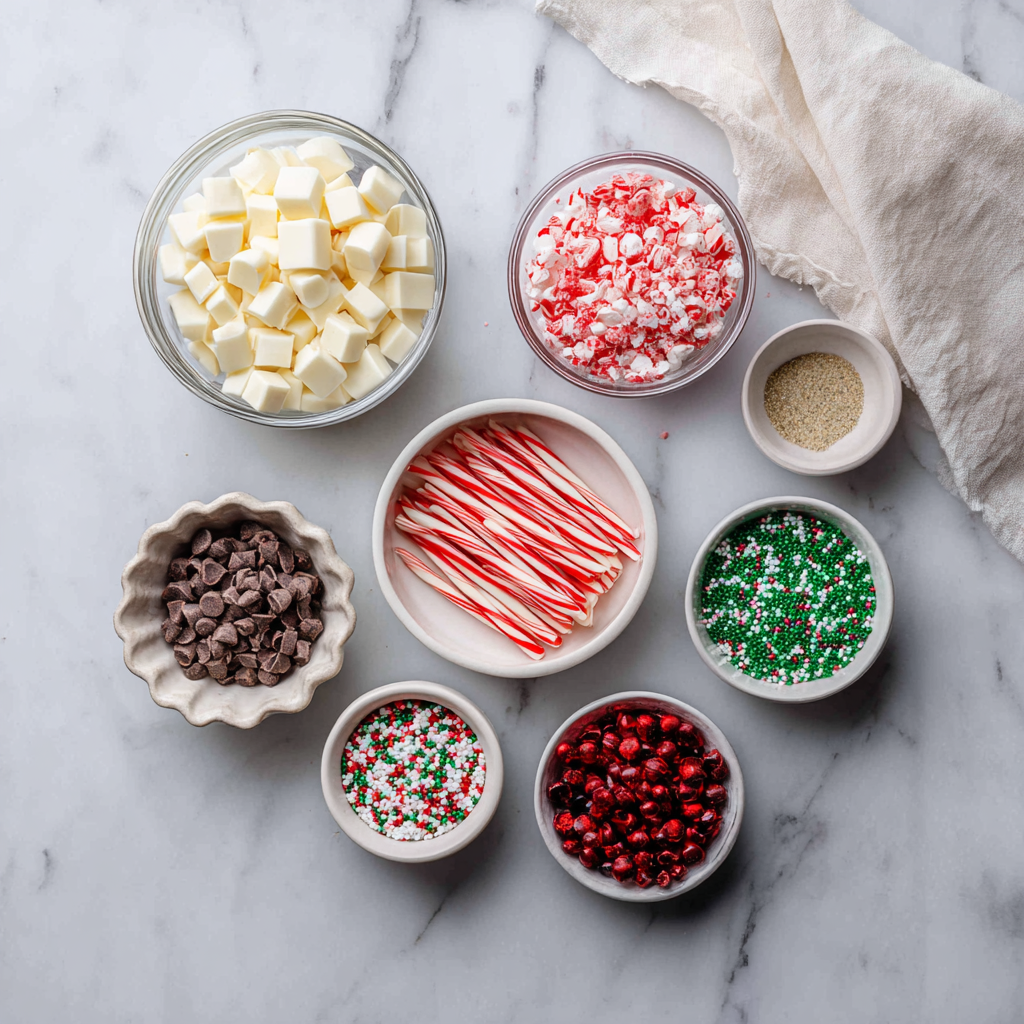
- Mini or Standard Candy Canes (2 per lollipop): Ensure they are traditional peppermint for the best “snap.”
- Lollipop Sticks (8–10): Paper or plastic; available at most craft stores.
- White or Dark Chocolate Melting Wafers (1 cup): High-quality melts provide a smoother finish than chocolate chips.
- Festive Sprinkles: Gold stars, crushed peppermint, or holly-shaped quins.
- Parchment Paper or Silicone Mat: Crucial for a non-stick release.
Timing: Efficiency and Set-Up
Total time investment: 25 minutes.
- Prep & Layout: 5 minutes.
- Softening/Baking: 3–5 minutes.
- Filling & Cooling: 15 minutes.
Step-by-Step Instructions
Step 1: The Heart Alignment
Preheat your oven to 150°C (300°F). Line a baking sheet with parchment paper. Place two candy canes facing each other to form a heart shape.
Actionable Advice: Place a lollipop stick in the center where the two “tails” of the candy canes meet. Ensure the stick extends about an inch into the heart to provide a strong anchor.
Step 2: The “Flash Soften”
Place the tray in the oven for 3 to 5 minutes.
- Expert Insight: You are not looking to melt the candy into a puddle. You only want the candy canes to become slightly tacky and soft so they fuse together at the touch-points.
Step 3: The Squeeze
Remove the tray from the oven. Carefully and quickly pinch the bottom tips of the candy canes together around the lollipop stick.
- Caution: The sugar will be hot! Use the back of a spoon if your fingers are heat-sensitive.
Step 4: The Filling
Once the “heart frame” has cooled and hardened (about 2 minutes), melt your chocolate wafers in 30-second intervals in the microwave. Spoon or pipe the melted chocolate into the center of the heart.
Pro Tip: Tap the baking sheet gently on the counter to help the chocolate level out and fill all the corners of the heart.
Step 5: The Garnish
While the chocolate is still wet, add your sprinkles or a light dusting of crushed peppermint. Let the lollipops sit at room temperature for 15 minutes or in the fridge for 5 minutes until completely solid.
Nutritional Information
- Calories: 85 kcal per lollipop.
- Total Fat: 3.5g (Sourced from the chocolate filling).
- Saturated Fat: 2g.
- Total Carbohydrates: 14g.
- Sugars: 12g.
- Protein: 0.5g.
Common Mistakes to Avoid
- Over-baking: If the candy canes stay in the oven too long, the red stripes will bleed into the white, and the heart will lose its crisp shape.
- Cheap Chocolate: Chocolate chips often contain “stabilizers” that prevent them from flowing smoothly into the heart. Use “melting wafers” or “couverture” for a glass-like finish.
- Moving Too Fast: Trying to peel the lollipops off the parchment before the chocolate is fully set will cause the stick to pull out.
Gifting and Storage
- Storage: Store in a cool, dry place. Humidity is the enemy of hard candy; it will make the lollipops sticky.
- The “Boutique” Look: Place each lollipop in a small cellophane bag and tie it with a red ribbon. These make excellent DIY stocking stuffers or “place cards” for a Christmas dinner table.
Would you like me to generate a “Flavor Variation Guide” using white chocolate and matcha or dark chocolate and sea salt?